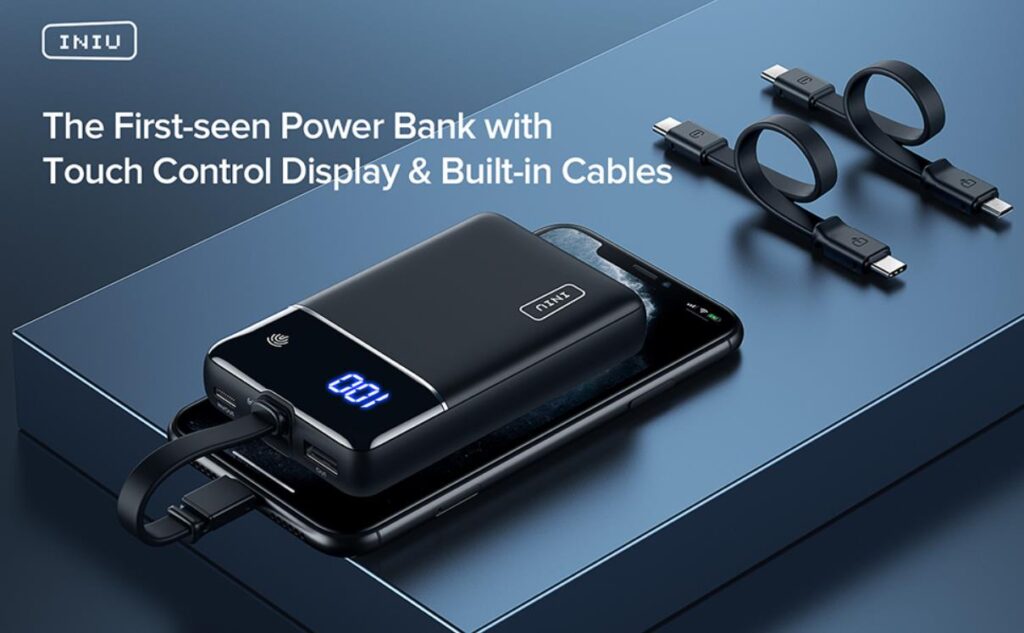
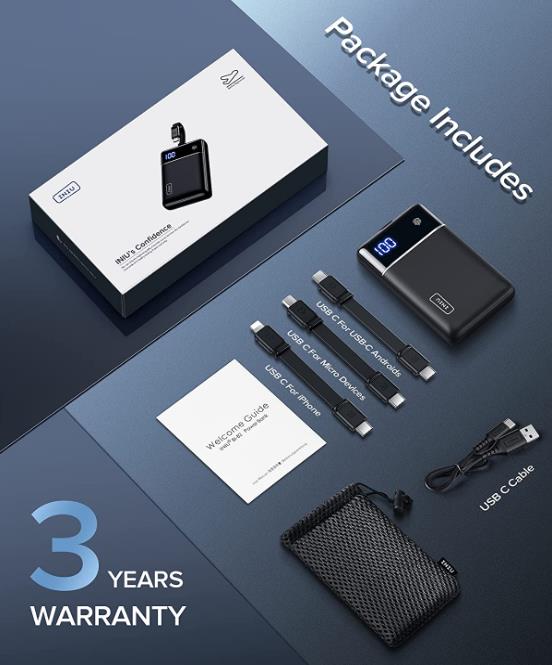
INIU MegaPower
INIU Power Bank Instructions BI-B6 10500mAh with LED Display
INIU Power Bank BI-B6 Manual
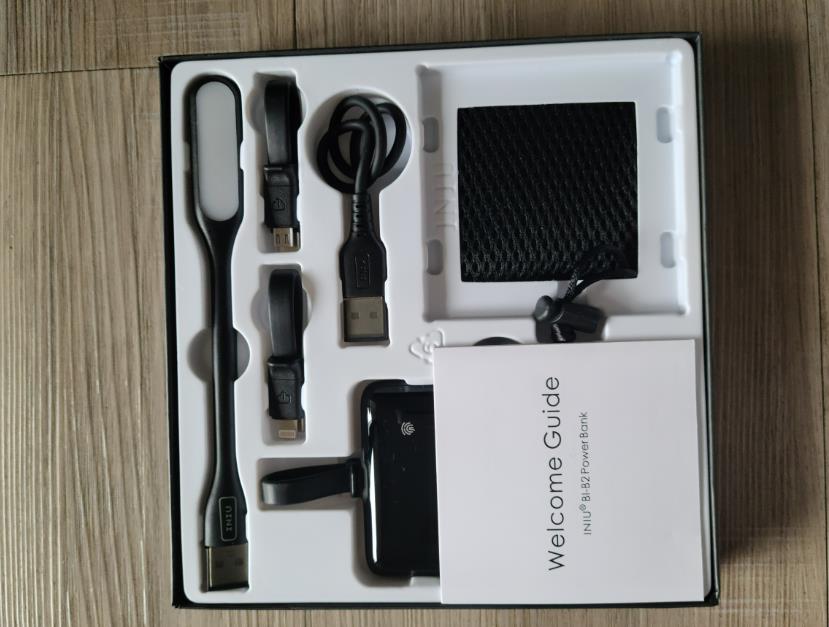
Welcome Guide INIU BI-B6 Power Bank
30-Day Money Back Guarantee
30 Tage Geld-zurück-Garantie | Garantie de remboursement de 30 jours
Garantía de devolución de dinero de 30 días
Garanzia di Rimborso di 30 Giorni | 30日間の返金保証
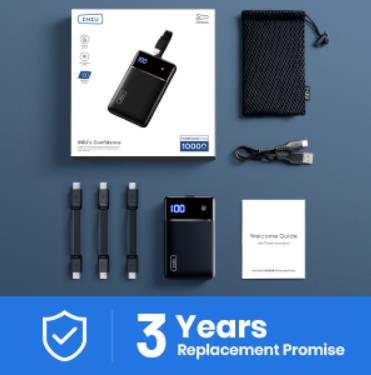
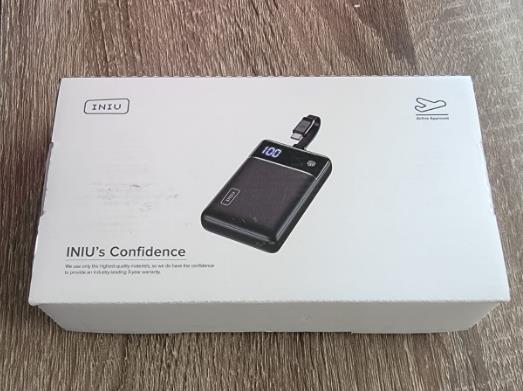
3-Year Warranty
3 Jahre Garantie | Garantie de 3 ans | Garantia de 3 años | Garanzia di 3 anni | 三年間保障
Life-time Technical Support
Lebenslanger technischer Support | Support technique à vie
Soporte técnico de por vida|Supporto Tecnico a Vita | 生涯の技術廿ポ一卜
Kundenservicel Service Clients | Servicio al | Cliente Assistenza clienti | カスタマ一サービス
INIU Power Bank BI-B6 Specs
Spezifikationen | Specificazioni | Especificaciones I Especificación | 製品仕樣
| Model Number | BI-B6 |
| Capacity | 10500mAh/38.8Wh |
| Size | 5.3×2.8×0.6in/136×70×15mm |
| Weight | 7.4oz/210g |
| Input | 5V=3A,9V=2.22A,12V=1.5A |
| Output | USB-C:5V=3A,9V-=2.22A,12V=1.5A USB-A:4.5V=5A,5V=4.5A,9V=2A,12=1.5A |
| Fast Charging Protocols Supported | USB-C Input:PD3.0/PD2.0 Output:PPS/PD3.0/PD2.0 |
| Fast Charging Protocols Supported | USB-A QC4.0+/QC4.0/Qc3.0/Qc2.0,SCP. FCP,AFC,MTK PE2.0/PE1.1,SFCP |
| Customer Service | 3-Year Warranty Life-Time Technical Support |
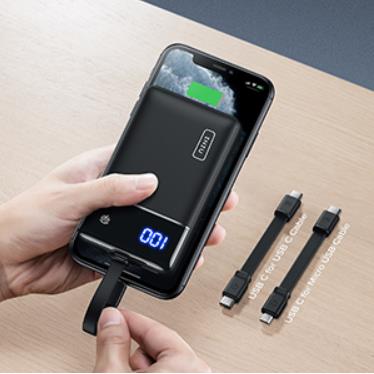
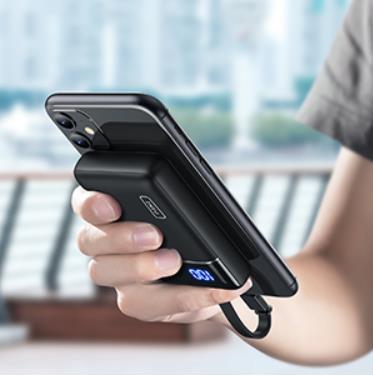
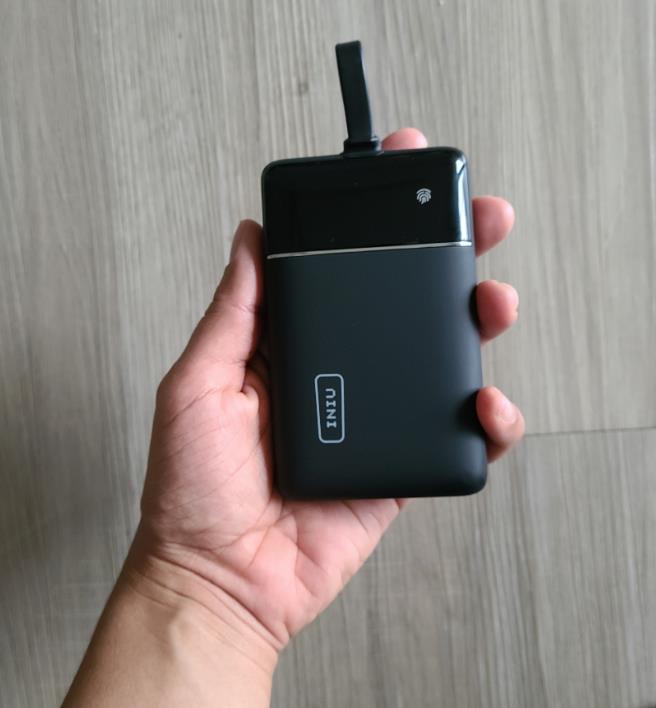
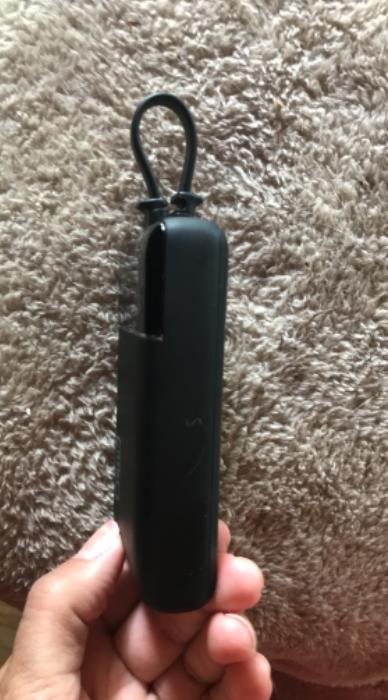
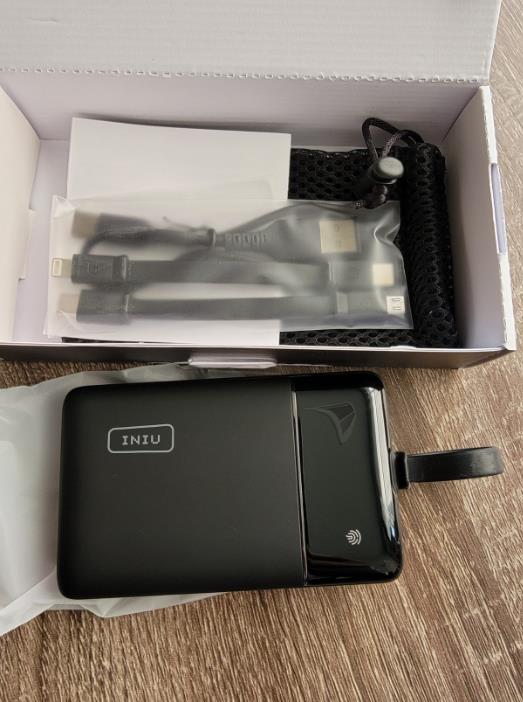
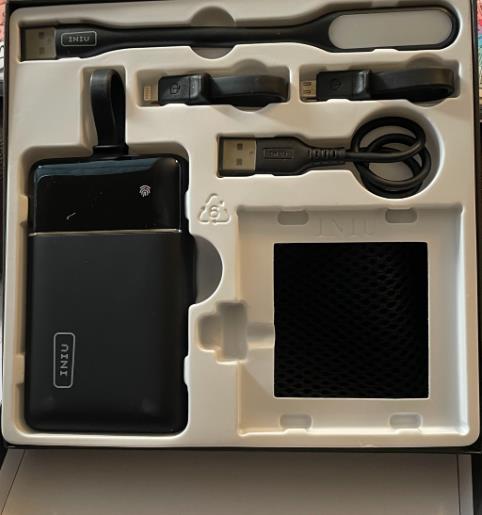
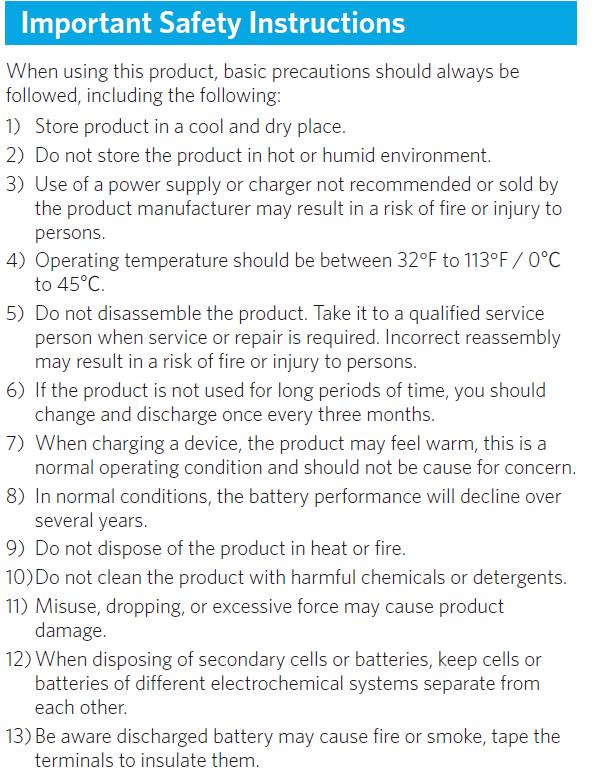
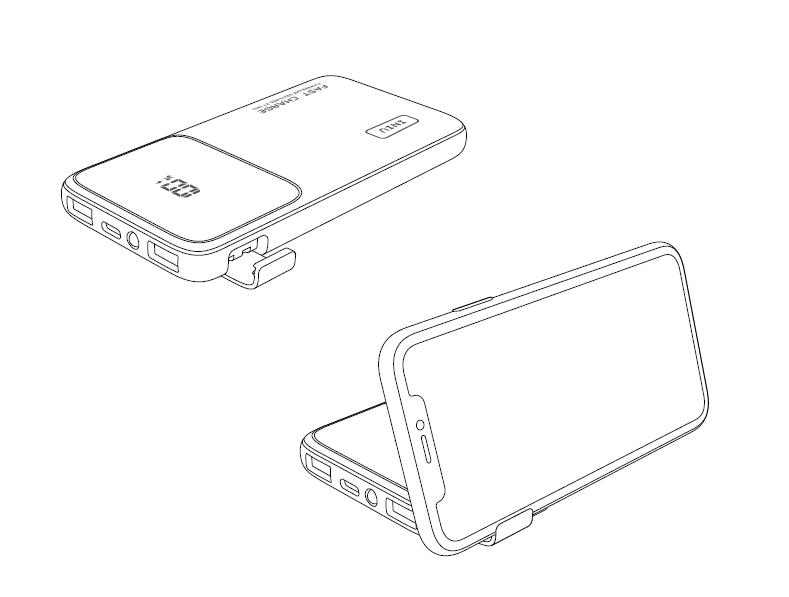
Push-out Phone Holder
US:Push out the built-in phone holder for a hand-free experience.
DE:schieben sie den eingebauten handyhalter heraus, um die hände zu befreien.
FR:pousser le support de téléphone intégré pour une expérience de main-libre.
IT:spingere il supporto incorporato del cellulare per un’esperienza a mani libere.
ES:empuje hacia fuera el soporte del teléfono equipado para experimentar llamadas de manos libres.
JP:内蔵のスマホホルダーを押し出すと、ハンズフリーの体験を楽しむことができる。
EN – English -US UK CA – INIU Power Bank BI-B6 Instructions
US UK CA Canada AU Australia
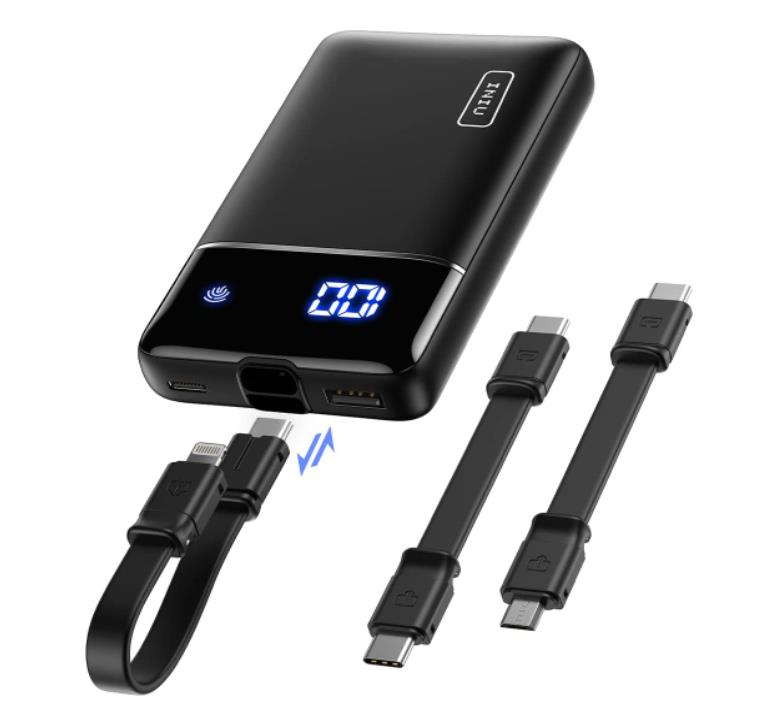
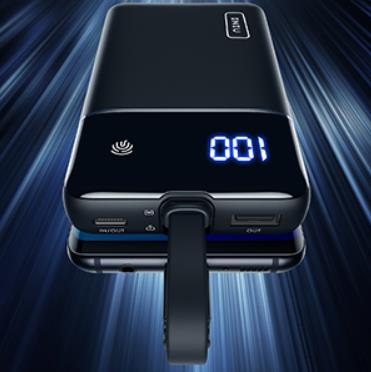
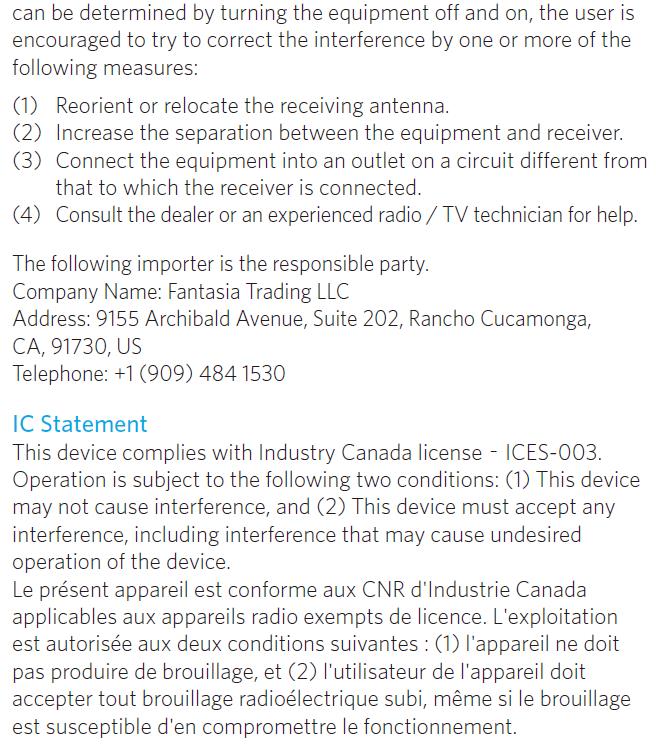
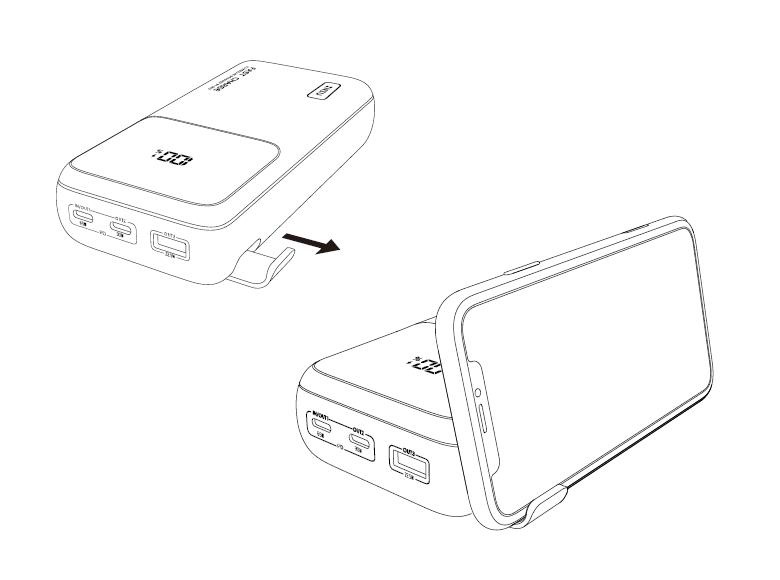
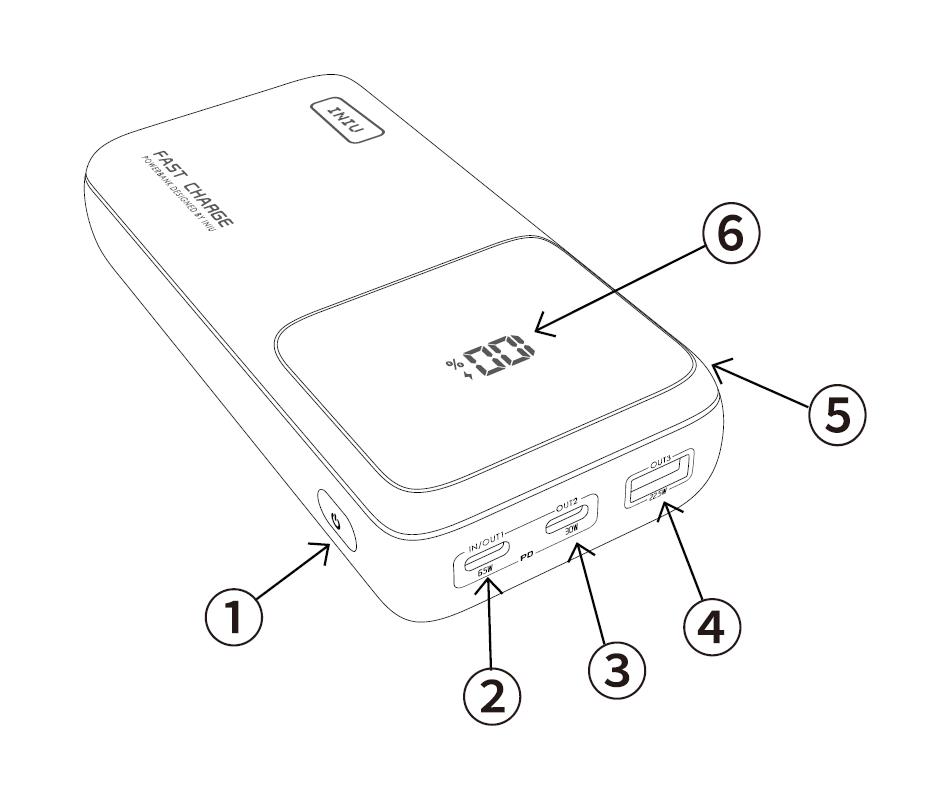
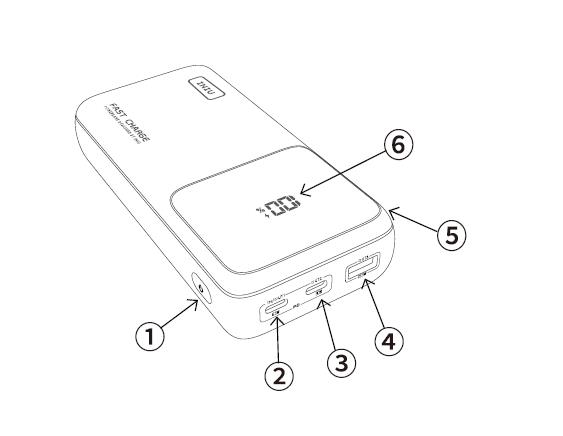
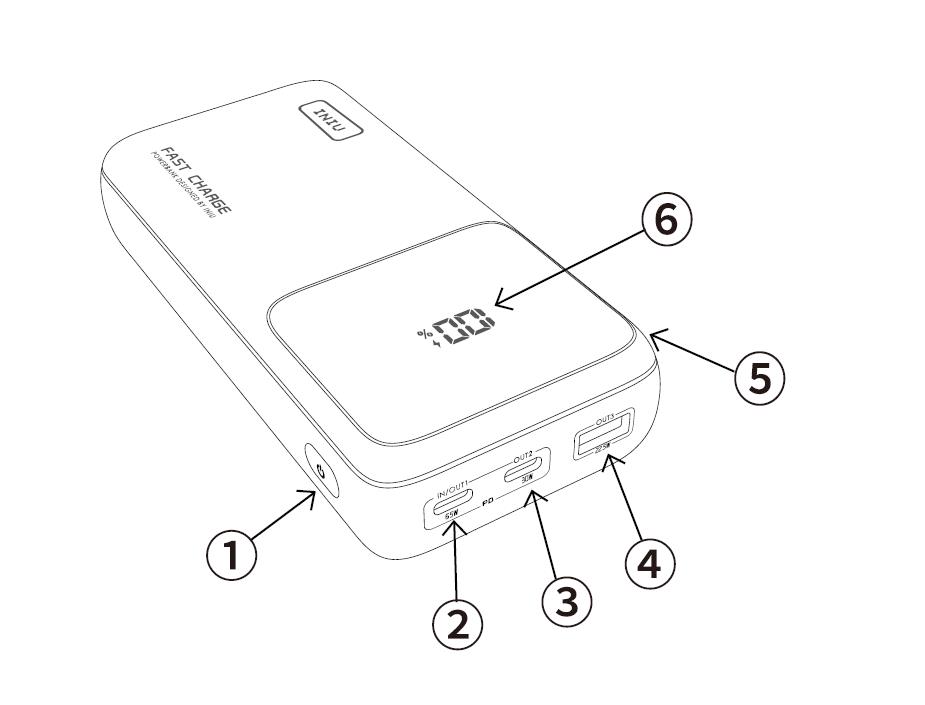
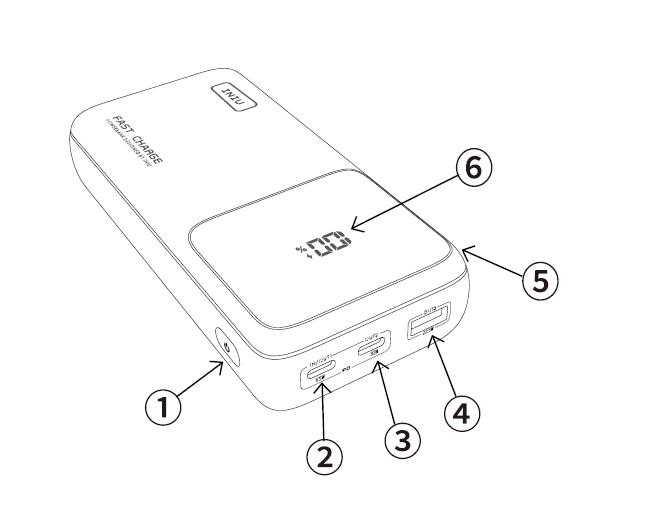
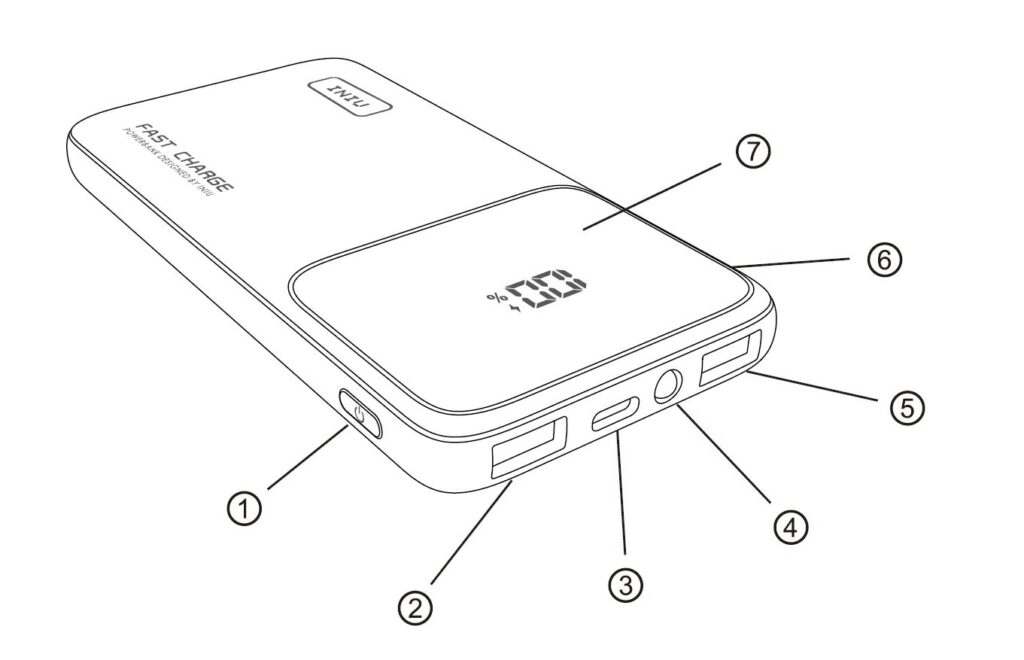
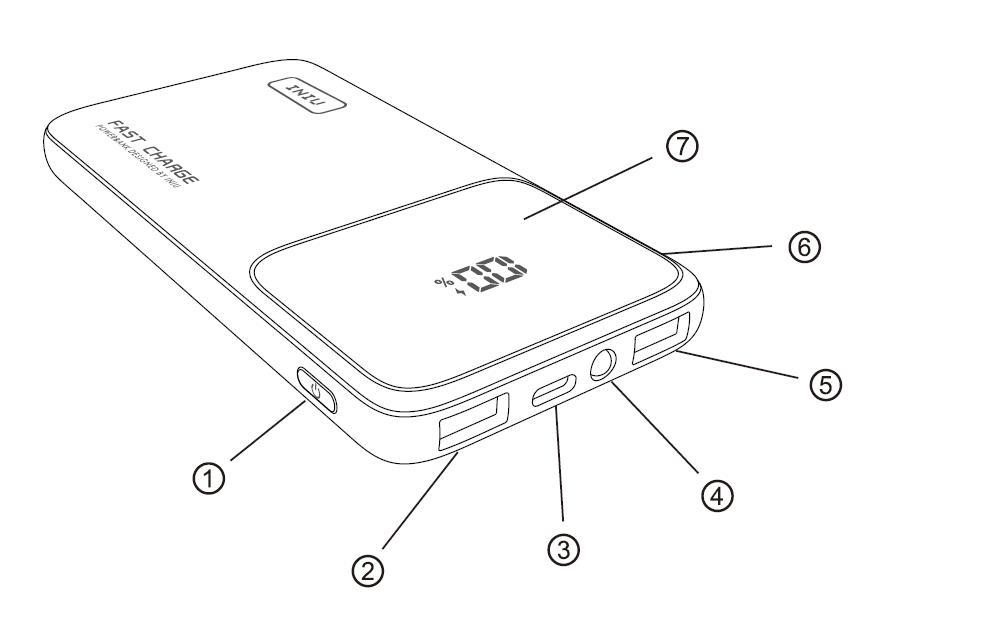
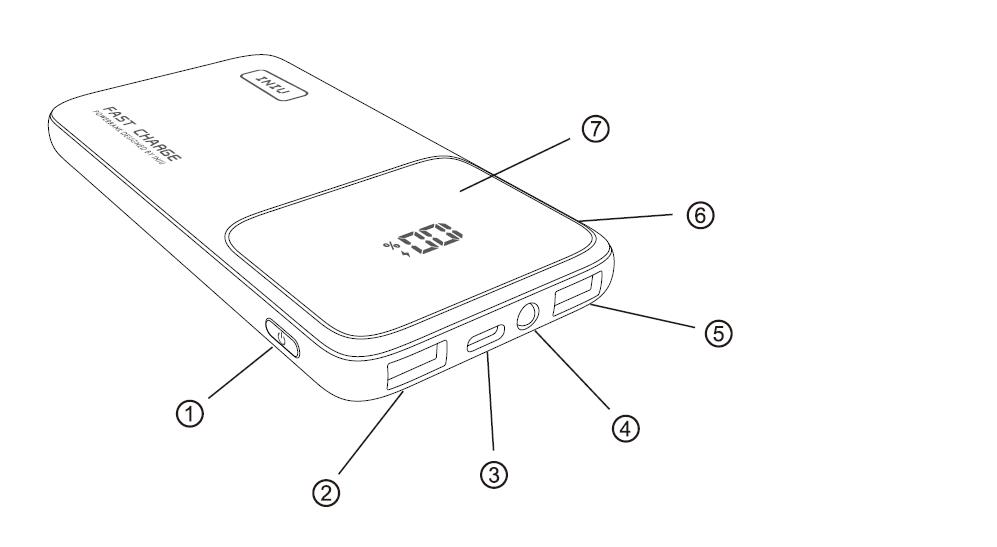
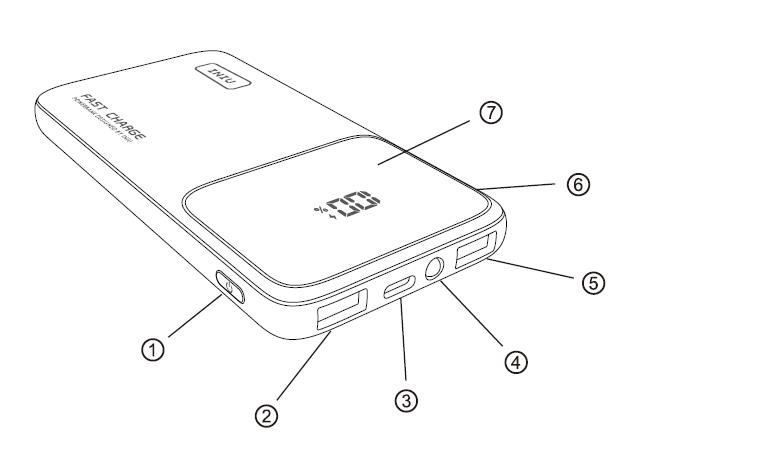
Product Overview
- ①Power Button
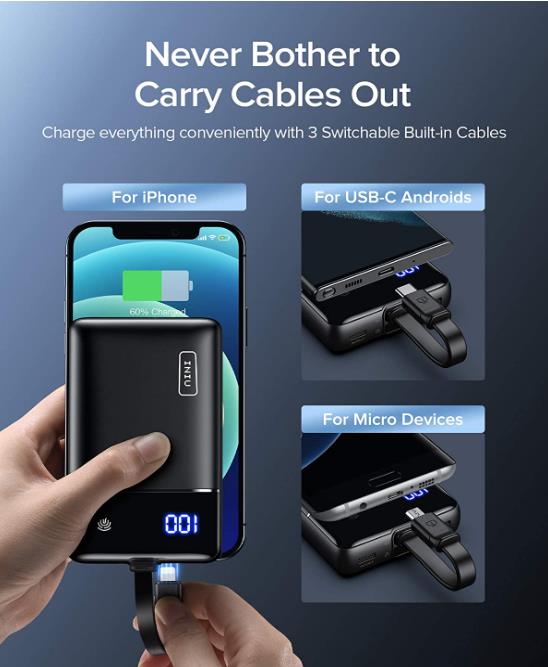
- ②USB-A Output
- ③USB-C Input / Output
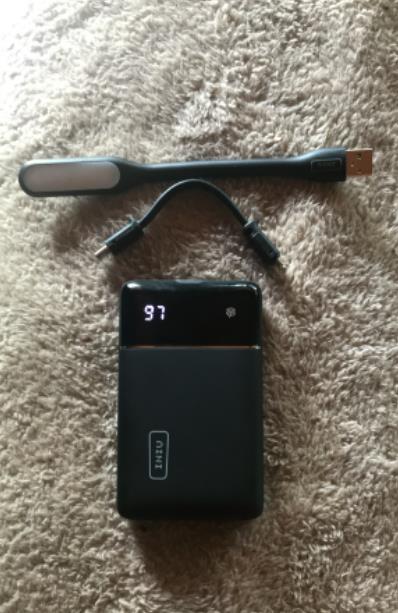
- ④ Built-in Flashlight
- ⑤USB-A Output
- ⑥ Push-out Phone Holder
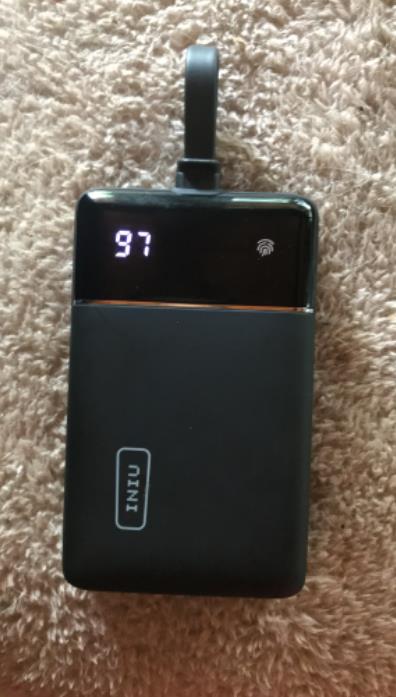
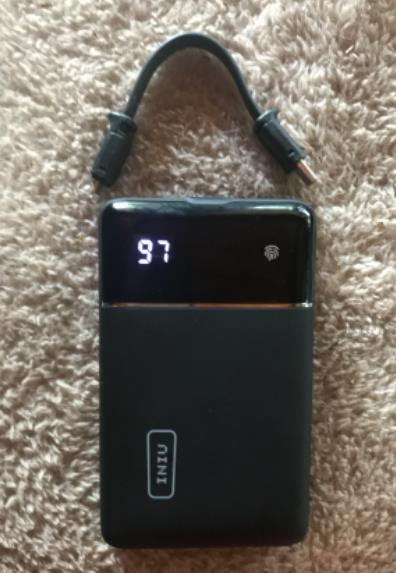
- ⑦LED Power Display
How to Turn On INIU Power Bank BI-B6
- Press the power button once , it will turn on and LED display power on
- Plug the USB to the Power Bank, the Power bank will turn on automatically
How to Turn Off INIU Power Bank BI-B6
- Press and Hold the power button for 3 seconds , it will power off
- Do nothing – no any charging or flashlight lighting, it will power off auto
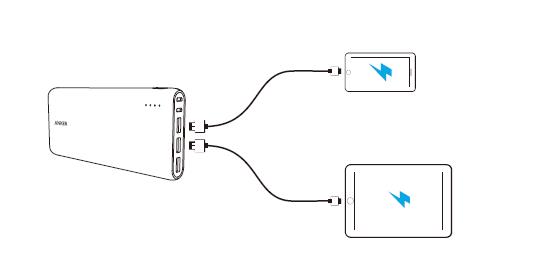
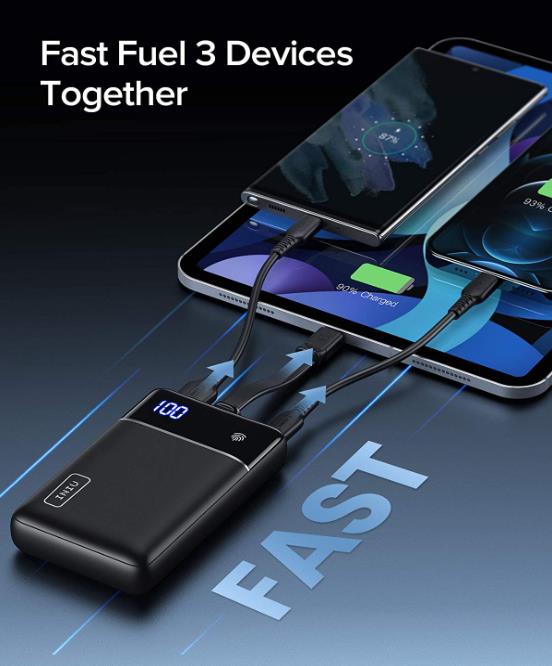
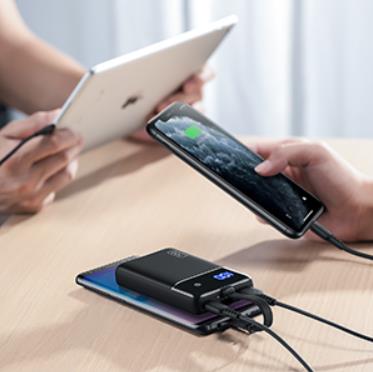
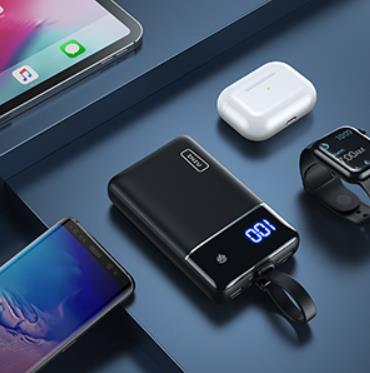
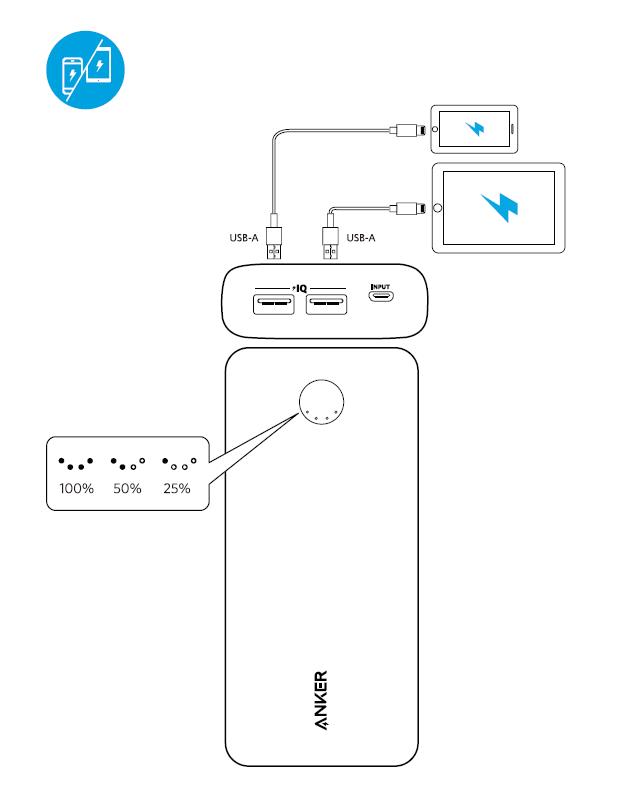
How to Charge your devices
- Connect your device to the power bank with a suitable cable,the LED digits will stay on during charging.
- If your device is fast-charging-capable,connect it to the power bank with a fast-charging cable,the indicator “will stay on during fast charging.
- Note:Fast charging mode can not be activated when charging multiple devices simultaneously.
- When the power level is 10% below,the LED digits will keep blinking.
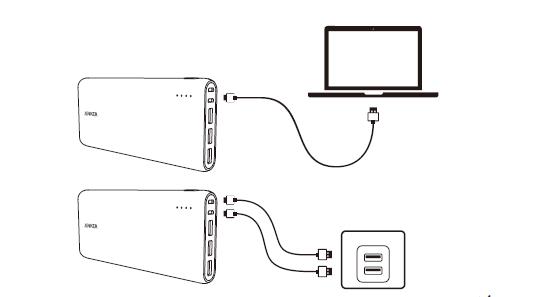
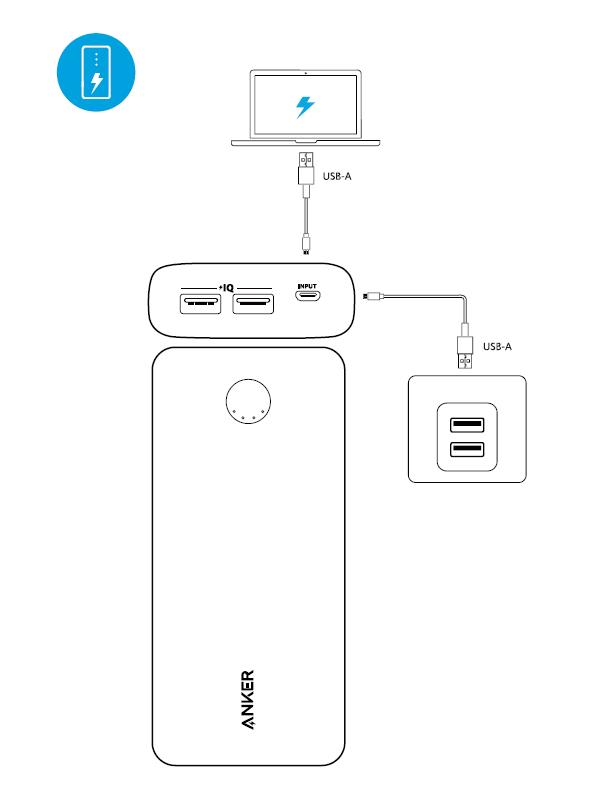
How to Charge the Power Bank
- Connect the bank to an adapter with a USB C cable,and it will start to charge automatically.While charging,the last digit will keep blinking until a solid 100%is displayed.
- To charge it under Fast charging mode,both the adapter and the cable are required to be Fast Charging supported.The indicator“,”will stay on during fast charging.
- The charging time varies depending on the Power of the adapter used:
| Adapter Type | Charging Time |
| 18W Fast-Charging Adapter | 3h |
| 5V/2A Adapter | 6h |
| 5V/1A Adapter (e.g.iPhone USB-A Adapter) | 10h |
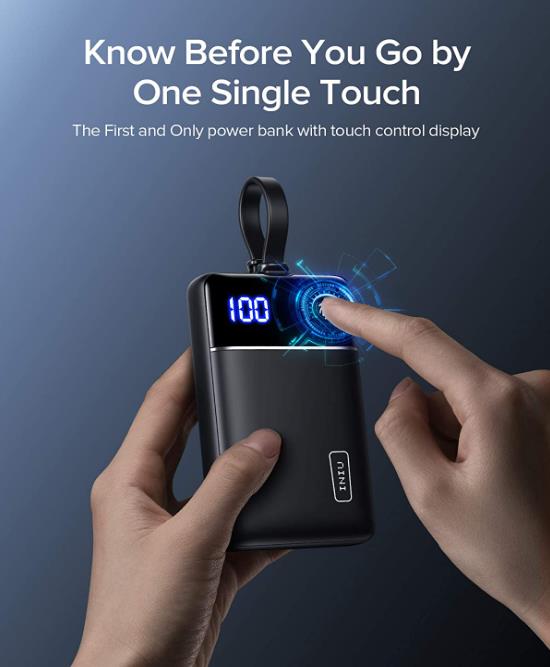
How to Check the Power Level
- Press the power button once to check the power level.
- The LED power display will turn off automatically after 20s.
How to Turn On INIU Power Bank Flashlight
- Press the power button twice to turn it on
How to Turn Off INIU Power Bank Flashlight
- Press the power button twice to turn it off.
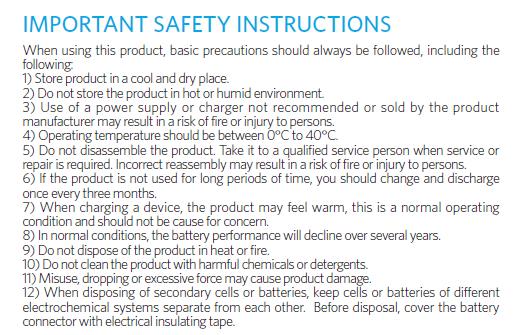
Safe & Help Attentions – Use Last longer
- To preserve the battery lifespan,use and recharge the bank at least once every 6 months.
- Do not drop,puncture,disassemble,or crush.
- Keep away from heat sources or liquids.
- The working temperature of the power bank is from 14’F to 113’F.
- Please use indoors in extremely cold areas.
How to use INIU power bank for the first time
How long to charge power bank 10000mah first time
- When you got the new Power bank , how to use for the first time:
- You should read the manual first
- Then full charged it , recommend 24 hours, even it shows charged fully!
- Recommend use original charger or cable!
How to Know If INIU Powerbank is Fully Charged
How do you know when Power bank is fully charged
- If INIU Powerbank is Fully Charged the LED display show 100% battery
DE – Dutch – Germany – INIU Powerbank Bedienungsanleitung Deutsch Anleitung BI-B6
DE
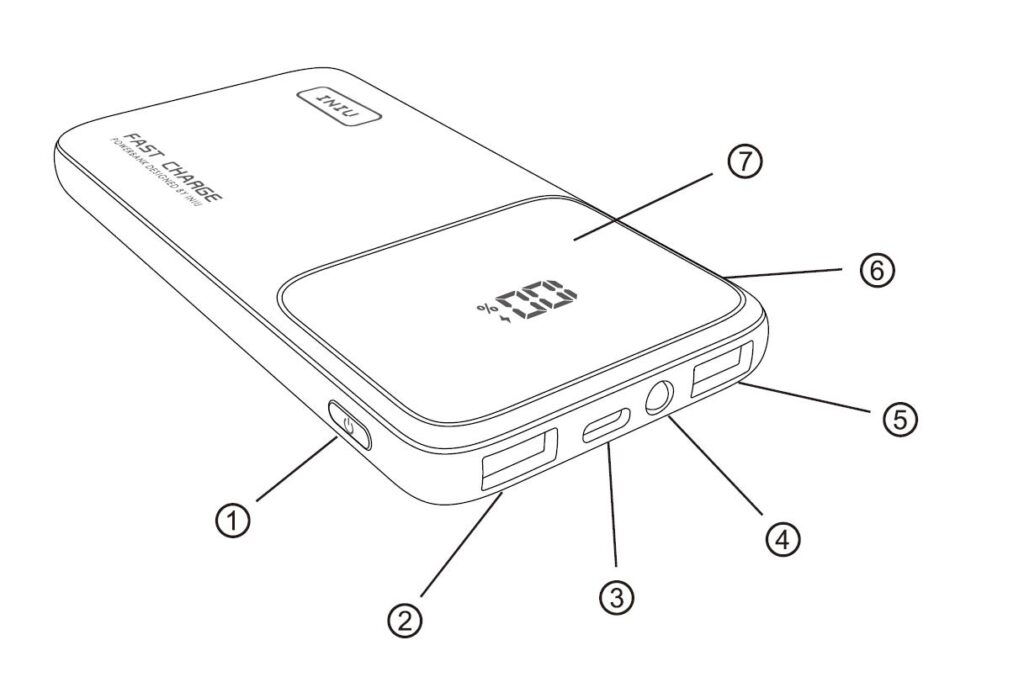
Aufbau des Produkts
- ①Netzschalter
- ②USB-A-Ausgang
- ③ USB-C-Eingang/-Ausgang
- ④ Eingebaute Taschenlampe
- ⑤USB-A-Ausgang
- ⑥ Herausschieben-handyhalter
- ⑦LED-Anzeige
ihre geräte aufladen
iniu powerbank aufladen
- Schließen sie ihr gerät mit einem geeigneten kabel andie powerbank an. die led-ziffern leuchten während des ladevorgangs immer auf.
- Der schnelllademodus wird automatisch aktiviert, wenn die power bank über ein schnellladekabel an ein gerät mit schnellladefunk- tion angeschlossen wird. die anzeige .+” leuchtet während des schnellladevorgangs.
- hinwei: der schnelllade-modus kann nicht aktiviert werden, wenn mehrere geräte gleichzeitig aufgeladen werden.
- Wenn die batterie unter 10% ist, blinken die led-ziffern immer.
Powerbankaufladen
- Verbinden sie die power bank mit einem usb-c-kabel mit dem adapter. während des ladevorgangs blinkt immer die letzte ziffer, bis eine feste 100% angezeigt wird.
- Beim schnelllade-modus müssen sowohl der adapter als auch das kabel das schnellladen unterstützen. die anzeige ,” leuchtet während des schnellladevorgangs.
- Die ladezeit hängt von der leistung des verwendeten adapters ab:
| Adapter-Typ | Ladezeit |
| 18W Schnelllade-Adapter | 3Std. |
| 5V/2A Adapter | 6Std. |
| 5V/1A Adapter (z.B.iPhone USB-A-Adapter) | 10Std. |
Batteriestand anzeigen
- Drücken sie den netzschalter einmal, um den batteriestand
- anzuzeigen.
- Die led-leistungsanzeige schaltet sich nach 20 sekunden einschalten automatisch aus.
Eingebaute taschenlampe ein-/ausschalten
- Drücken sie zum ein- und ausschalten zweimal den netzschalter.
Achtung
- Um die lebensdauer der batterie zu verlängern, sollte die powerbank mindestens alle 6 monate verwendet und wieder aufgeladen werden.
- Nicht fallen lassen, durchstechen, zerlegen oder zusammendrücken.
- Halten sie es von wärmequellen oder flüssigkeiten fern.
- Die arbeitstemperatur der powerbank liegt zwischen -10’c und 45c.
Gewährleistung
Bei iniu verwenden wir nur die hochwertigsten materialien, sodass wir ihnen zuversichtlich bieten:
- 30-tägige geld-zurück-garantie
- branchenführende 3-jährige garantie
- lebenslange technische unterstützung
DE – Dutch – Germany – INIU Powerbank Anleitung BI-B6
FR – French – France – INIU Power Bank d’utilisation – Batterie Externe BI-B6
FR
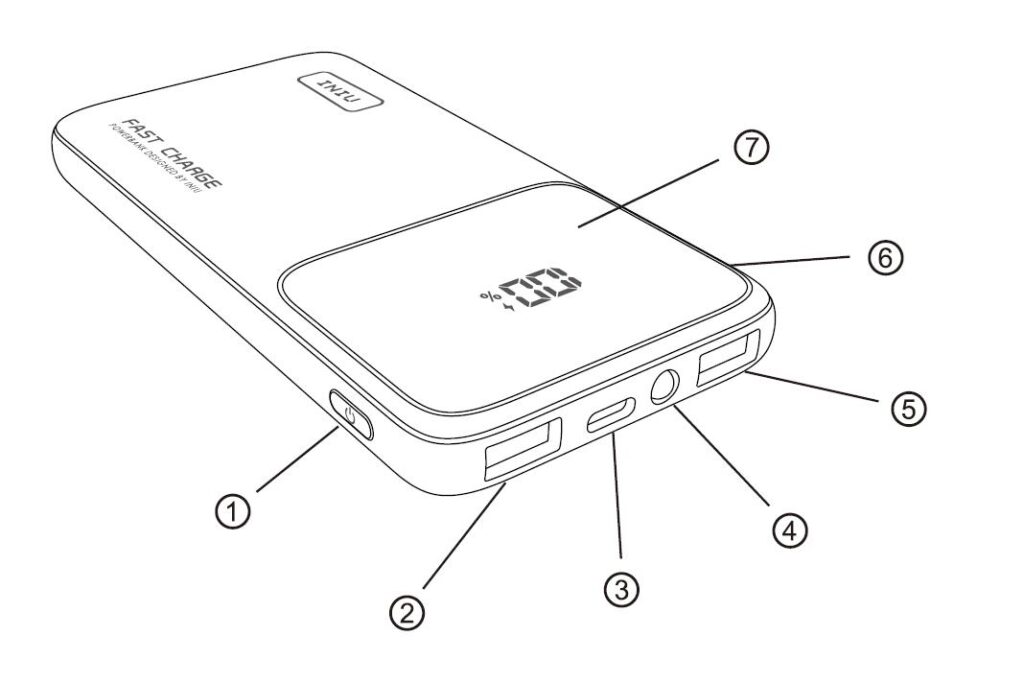
Aperçu des produits
- ①Bouton d’alimentation
- ②Sortie usb-a
- ③Lampe de poche intégrée
- ④Entrée/sortie usb-c
- ⑤Sortie usb-a
- ⑥ Porte-téléphone poussée
- ⑦Affichage de la puissance
Chargez vos appareils
- Connectez votre appareil à la banque d’énergie avec un câble approprié, et il commencera à se charger automatiquement avec l’affichage led restant allumé.
- Le mode de charge rapide sera activé automatiquement lorsque l’appareil est connecté à un appareil de charge rapide avec un câble de charge rapide, l’indicateur “4” reste allumé pendant la charge rapide.
- remarque: le mode de charge rapide ne peut pas être activé lorsque vous chargez plusieurs appareils simultanément.
- lorsque le niveau de puissance est inférieur de 10%, les chiffres de l’écran led continuent de clignoter.
Chargez la banque d’énergie
- Connectez la banque à un adaptateur avec un câble usb c et elle commencera à se charger automatiquement. pendant le chargement, le dernier chiffre continuera à clignoter jusqu’à ce qu’un 100% solide soit affiché.
- Pour charger en mode de charge rapide, l’adaptateur et le câble doivent tous deux être compatibles avec la charge rapide. l’indicateur “,”reste allumé pendant la charge rapide.
- le temps de charge varie en fonction de la puissance des adaptateurs utilisés:
| Type d’adaptateur | Temps de charge |
| Adaptateur de charge rapide 18W | 3h |
| Adaptateur 5V/2A | 6h |
| Adaptateur 5V/1A (par exemple,adaptateur USB-A d’IOs) | 10h |
Connaître le niveau de puissance
- Pressez le bouton d’alimentation une fois afin de vérifier le niveau de puissance.
- Après 20s, l’affichage led de la puissance s’éteint automatiquement.
Allumer/éteindre la lampe de poche intégrée
- Pressez le bouton d’alimentation deux fois pour allumer ou éteindre.
Attentions
- En vue de préserver la durée de vie de la batterie, utilisez et rechargez la banque au moins une fois tous les 6 mois.
- évitez de faire tomber, de percer, de démonter ou d’écraser la batterie.
- Tenir à l’écart des sources de chaleur ou des liquides.
- La température de fonctionnement de la banque d’énergie est entre 14’f et 113’f. veuillez l’utiliser à l’intérieur dans des zones extrêmement froides.
Garantie
à l’iniu, les matériaux que nous utilisons sont de la plus haute qualité, ce qui nous permet de vous fournir en toute confiance:
- assurance de remboursement de 30 jours
- garantie de 3 ans, la meilleure du secteur
- support technique à vie
IT – Italian – Italy – INIU Power Bank Manuale utente Istruzioni Italiano BI-B6
Panoramica del prodotto
- ① tasto di alimentazione
- ②uscita usb-a
- ③torcia incorporata
- ④ingresso / uscita usb-c
- ⑤uscita usb-a
- ⑥ supporto da spingere del cellulare
- ⑦indicatore di alimentazione
Ricaricare i dispositivi
- Collegare il dispositivo al power bank con un cavo adatto, e inizierà a ricaricarsi automaticamente con lo schermo a led acceso.
- La modalità di ricarica rapida viene attivata automaticamente quando il power bank è collegato a un dispositivo di ricarica rapida con un cavo di ricarica rapida. l’indicatore “4”rimarrà acceso durante la ricarica rapida.
- nota: la modalità ricarica rapida non può essere attivata quando si caricano più dispositivi contemporaneamente.
- Quando il livello di potenza è inferiore a 10%, le cifre a led rimarranno lampeggianti.
Caricare il power bank
- Collega la banca a un adattatore con un cavo usb c e inizierà a caricarsi automaticamente. durante la ricarica, l’ultima cifra rimarrà lampeggiante finché non viene visualizzato il numero fisso 100%.
- Per caricare il power bank in modalità ricarica rapida, sia l’adattatore sia il cavo devono essere conformi per la ricarica rapida; l’indicatore “;” rimarrà acceso durante la ricarica rapida.
- Il tempo di carica varia a seconda del voltaggio e delle potenza adattatore utilizzato:
| tipo di adattatore | tempo di carica |
| adattatore di carica rapida da 18w | 3ore |
| adattatore 5v/2a | 6ore |
| adattatore 5v/1a (ad es. adattatore usb-a iphone) | 10ore |
Conoscere il livello di carica
- Premere una volta il tasto di accensione per visualizzare il livello di carica.
- Il display led si spegne automaticamente dopo 20 secondi.
Accendere e spegnere la torcia incorporata
- Premere due volte il tasto di alimentazione per accendere o spegnere la torcia.
Attenzione
- Per preservare la durata della batteria, utilizzare e ricaricare il power bank almeno una volta ogni 6 mesi.
- Non forare, smontare e schiacciare il power bank o farlo cadere.
- Tenere lontano da fonti di calore o liquidi.
- La temperatura di funzionamento del il power bank è tra i -10’c ai 45’c; nelle zone estremamente fredde utilizzare il power bank negli spazi interni.
Garanzia
in iniu utilizziamo solo materiali della qualità più alta per fornirti
con certezza:
- Garanzia di rimborso in 30 giorni
- Garanzia di 3 anni leader del settore
- Supporto tecnico a vita
ES – Spanish – Spain – INIU Power Bank Manual de usuario – Bateria Externa BI-B6
ES
Descripción del producto
- ①botón de encendido
- ②salida usb-a
- ③linterna incorporada
- ④entrada/salida de usb-c
- ⑤salida usb-a
- ⑥ soporte de teléfono de empujar
- ⑦pantalla led de potencia
Cargar sus dispositivos
- Conecte su dispositivo al cargador con un cable adecuado, los dígitos led permanecen encendidos durante la carga.
- El modo de carga rápida se activa automáticamente cuando se conecta a un dispositivo con capacidad de carga rápida con un cable de carga rápida. el indicador “4”mantiene encendido durante la carga rápida.
- nota: el modo de carga rápida no puede activarse cuando se cargan varios dispositivos al mismo tiempo.
- Cuando el nivel de energía de batería es inferior a 10%, los números en pantalla led parpadearán continuamente.
Cargar el cargador portátil
- Conecte el banco de energía a un adaptador con un cable usb c. se cargará automáticamente. durante la carga, el último dígito seguirá parpadeando hasta que muestre un 100% estable.
- Para cargarlo en el modo de carga rápida, tanto el adaptador como el cable deben ser compatibles con la carga rápida; el indicador “4” mantiene encendido durante la carga rápida.
- El tiempo de carga varía en función de la potencia de los adaptadores usados:
| tipo de adaptador | tiempo de carga |
| adaptador de carga rápida de 18w | 3h |
| adaptador 5v/2a | 6h |
| adaptador de 5v/1a (por ejemplo, el adaptador usb-a de iphone) | 10h |
Conoce el nivel de poder
- Presione el botón de encendido una vez para comprobar el nivel de potencia.
- la pantalla led de potencia se apagará automáticamente en 20 segundos una vez que se encienda.
Endender y apagar la linterna incorporada
- Presione el botón de encendido dos veces para encender o apagar.
Atención
- Para prolongar la vida útil de la batería, use y recargue el cargador al menos una vez cada 6 meses.
- No lo deje caer, perfore, desmonte o aplaste.
- Manténgalo alejado de fuentes de calor o líquidos.
- La temperatura de trabajo del cargador es de 14 f a 113’f no lo use en su lugar con temperaturas extremadamente bajas.
Garantía
En iniu, solo utilizamos los materiales de calidad suprema,
brindándonos la confianza para proporcionarle:
- Garantía de reembolso de 30 días
- Servicio posventa de 3 años líder en la industria
- Soporte técnico de por vida
JP – Japanese – Japan – INIU モバイルバッテリーマニュアル BI-B6
JP
- 各部のなまえ
- ①電源ボタン
- ②USB-A出力ポート
- ③内蔵懷中電灯
- ④USB-C入力&出力ポート
- ⑤USB-A出力ポート
- ⑥ プッシュアウトスマホホルダー
- ⑦LED残量表示ディスプレイ
デバイスを充電する
- 適切なケーブルでデバイスをモバイルバッテリーに接続します、LEDディスプレ イが常時点灯すると、自動的に充電を開始します。
- 急速充電ケーブルで急速充電に対応するデバイスに接続すると、自動的に急 速充電します。急速充電中は、インジケーター「ャ」が常時点灯します。
- ご注意:两个及び以上のデバイスを同時に充電する場合は、急速充電モード は動作できせん。
- バッテリー残量が10%以下になると、LED上の数字が点滅します。
モバイルバッテリーを充電する
- USBCケーブルでモバイルバッテリーをアダプターに接続すると、充電が自動的に 開始されます。充電中は、ディスプレイの数字が100%に達するまで点滅を続けま す。
- 急速充電モードで充電するには、アダプターとケーブルの両方が高速充電に対応 している必要があります。急速充電中は、インジケーター「」が常時点灯します。
- 充電時間は、使用するアダプターによって異なります。
| アダプタータイプ | 充電時間 |
| 18W急速充電アダプター | 3h |
| 5V/2Aアダプター | 6h |
| 5V/1Aアダプター (iPhone USB-Aアダプターなど) | 10h |
バッテリー残量を確認
- 電源ボタンを1回押して、バッテリー残量を確認します。
- LED残量表示ディスプレイは、20秒後に自動的に消灯します。
内蔵懷中電灯のオン/オフ
- 電源ボタンを2回押してオン/オフにします。
使用上のご注意
- モバイルバッテリーの寿命を延ばすために、少なくとも6か月に回充電 してください。
- 落としたり、穴を開けたり、分解したり、つぶしたりしないでください。
- 熱源や液体に近づけないでください。
- モバイルバッテリーの動作温度は-10℃~45℃です。極寒地域の場合 は室内でご使用ください。
品質保証
INIUは、最高品質の素材のみを採用しているため、製品に強い自信を持って おります。お客様に以下の保証を提供しております。
- 30日間の返金保証
- 業界をリードする3年間の品質保証
- 生涯技術サポート